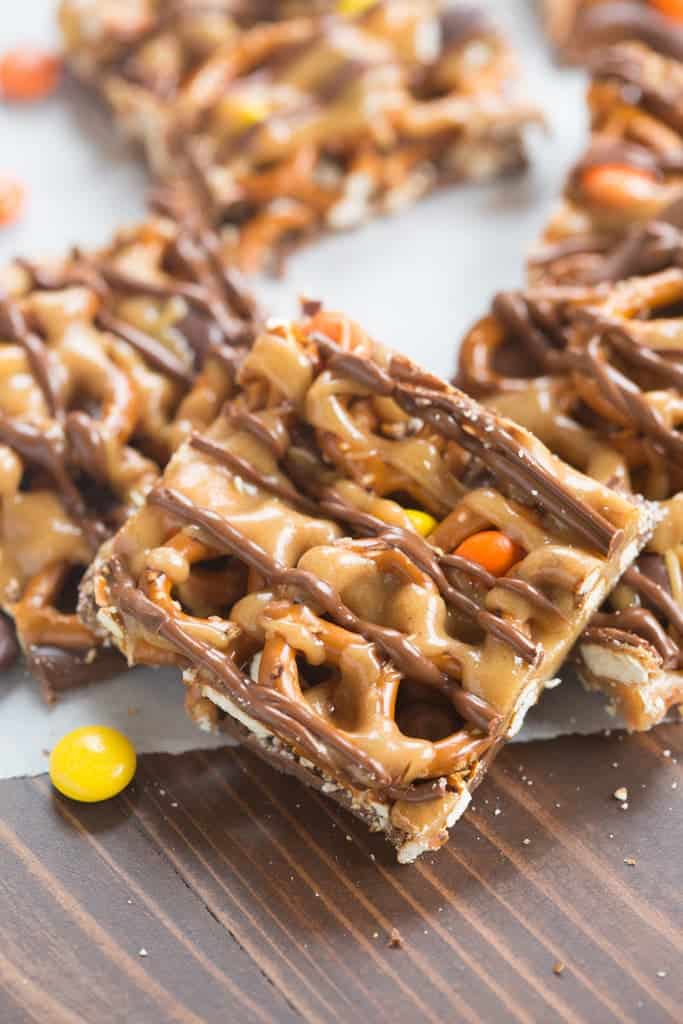
Layers of chocolate, mini pretzel twists and Reese’s pieces candy are topped with a yummy homemade peanut butter sauce. These Chocolate and Peanut Butter Pretzel Bars are the perfect NO BAKE, sweet and salty treat.
Life has been crazzzy busy at our house lately. Namely, my little three-month-old has torticollis. It’s not a huge deal and hopefully will be easily fixed with some physical therapy over the next few months.
My toddlers are out of preschool for the summer so my days have been turned upside down with mom duties. Like I told my husband when he called during lunch-time and asked what we did that morning: “Nothing, and everything”.
“Nothing” meaning nothing super exciting because we were busy doing “everything”–laundry, potty training (which means exxxtra laundry) feeding hungry kids, stretching exercises with baby etc. There is no more important job in the world than being the mama of these special kids, but boy do these three keep me BUSY.
Luckily my kids all sleep amazing and go to bed early. So come 7:30pm I have a quiet home and plenty of R&R.
Friday night is date night with the Jeff. Whether we go out or dine-in, we always like to share a sweet treat at the end of the night. With how tired I’ve been lately, it’s all I can manage to open the freezer and sneak a few frozen chocolate chips for us. PATHETIC, I know 😉 .
He recently requested these simple chocolate and caramel pretzel bars, so I decided to make a little twist on that recipe and add peanut butter! Best decision ever.
Some tips for this recipe:
Start with some melted chocolate. I like the ghiardelli brand of chocolate chips, for melting, or you could even melt a couple of Hershey’s chocolate bars.
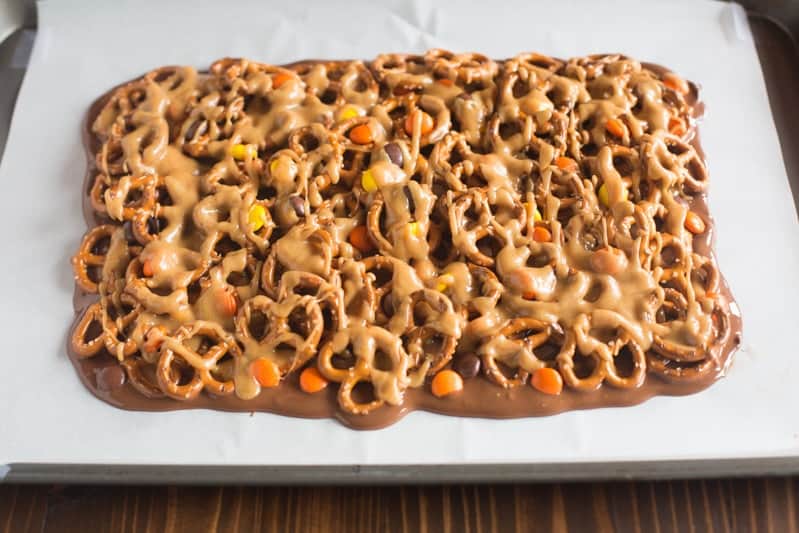
Smooth the melted chocolate onto parchment paper.
Throw on some mini pretzel twists and a sprinkle of some Reese’s pieces (one of my favorite candies!). The pretzels don’t need to be in an even layer.
Make the peanut butter sauce and drizzle it generously over the pretzels and candy. This is what makes everything stick together! I like to use smooth peanut butter, but if you want some peanut bits in your bars you could use chunky peanut butter.
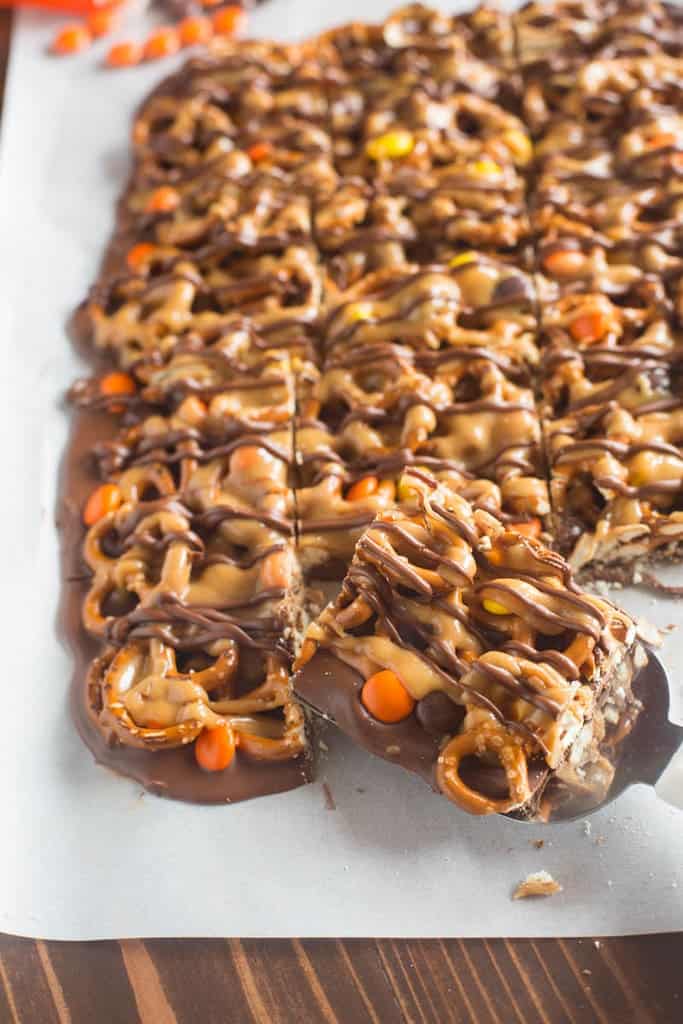
Top the bars with some more melted chocolate and allow it to set up in the fridge. YUM! Only a few ingredients and then end result is a totally yummy, sweet and salty treat.
Looking for more “bar” recipes? Try these:
- S’more Cookie Bars
- Toffee Chocolate Chip Bars
- The BEST Mint Brownies
- Sugar Cookie Bars
- Best Ever Peanut Butter Bars
You can also FOLLOW ME on FACEBOOK, TWITTER, INSTAGRAM and PINTEREST for more great recipes!
Recipe
Chocolate Peanut Butter Pretzel Bars
Ingredients
- 12 ounces semi-sweet chocolate chips (good quality )s , divided (I like Ghirardelli brand best for melting)
- 8 ounces mini pretzel twists , half of a regular 16-ounce bag
- 4 ounce box Reese's Pieces candies
Peanut Butter Sauce:
- 1/2 cup honey
- 1/3 cup granulated sugar
- 1/2 cup creamy peanut butter
- 1/2 teaspoon vanilla extract
Instructions
- Line a large, rimmed baking sheet with parchment paper.
- Melt 8 ounces of the chocolate chips gently in the microwave (on low heat, stirring every 15 seconds) until smooth.
- Spread the chocolate evenly over the parchment. Immediately add the pretzel twists and Reese's Pieces over the top (it's ok if they overlap a little) and gently press them into the chocolate.
For the peanut butter sauce:
- In a medium saucepan over medium heat add honey and sugar and stir well to combine.
- Bring to a boil and boil for 1 full minute, stirring. Remove from heat and stir in peanut butter until smooth.
- Stir in vanilla. Drizzle the peanut butter sauce over the top of the pretzels and candy.
- Melt remaining 4 ounces of chocolate and drizzle on top.
- Refrigerate until hardened.
- Cut or tear into pieces. Store in the fridge.
- You may also like, Graham Cracker Toffee Bars.
Notes
Nutrition
Did You Make This Recipe?
Tag @TastesBetterFromScratch on Instagram with #TastesBetterFromScratch!
Have you tried this recipe?!
RATE and COMMENT below! I would love to hear your experience.
This post contains affiliate links. I love sharing my favorite products and cooking tools with you guys!
This post contains affiliate links.

YESSSS!!!! No corn syrup!! Thank you for this recipe!!!!!
Could I use real maple syrup, maybe in a smaller amount, in stead of honey? I’m a Vermonter and we love our syrup!!
I haven’t tried it myself but it should work!
Are these able to be stored at room temperature or do they have to be kept in the fridge?
They should be fine at room temperature, unless you live in a warm humid climate.
If I cut down on the sugar/sweetness will the peanut butter sauce still be able to harden enough?
Hi Emma, the cooked sugar is what acts as the glue here. I’m sure you could cut down on it a little, but the more you cut out, the softer the sauce will be.
Never said to reserve some chocolate to drizzle at the end!
Otherwise turned out great and super easy!
So happy you liked them! In step two I have you melt just 8 ounces of the chocolate chips, and then in step 4 (after you make the peanut butter sauce) it says to melt the remaining chocolate to drizzle on top 🙂 .
Can you freeze this or store for awhile in the fridge for Christmas? Not sure if you have ever tried it.
A co-worker made these and they are delicious!! I’d love to share them at the holiday but need to make them in advance.
Hi Erin, I haven’t tried freezing them, but they will keep great in the fridge for at least 2 weeks. 🙂
AMAZING
Love this, cut down on the honey though, not peanut buttery enough!
What size baking sheet do you use?
You can use any large tray or baking sheet (it doesn’t even need to be oven proof). The pan you see in the photos above is a standard jelly-roll pan.